Pre-Requisite for Demo Import: Woocommerce
Import Demo Content
Things to do after Demo Import
Extra Imports including settings, categories etc.
Home Page Display
Revolution Slider
Assign Menus
Assign Widgets
Elementor Page Builder settings
Done

Done
Set Primary Menu
It is best recommended to set a primary navigation/menu after installing all the required plugins.
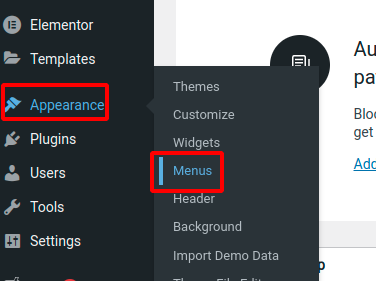
Step 1: Go to Appearance → Menus
Step 2: Create a menu by adding a menu name
Step 3: After creating the menu, check the Primary Menu checkbox and save
Step 4: Add the desired menu items from the left sidebar. To make a sub menu, hold and drag the menu to the right under the desired menu title.
Step 5: Add Mega Menu Variations:
1. Full Mega Menu
To add Full Width Mega Menu without icon like Destination Menu, check the mega menu full option
2. Half Mega Menu
To add Half width Mega Menu without icon, check the mega menu half option.
3. Icon Mega Menu
Add the sub menu for the sub title and sub sub menu for the list. Select the icon under the sub sub menu and add a short description.
Step 7: Save the Menu
Important info: If description textarea is not available, follow the following steps:
Step 1: Click the “Screen Options” at the top right corner in the menu page.
Step 2: Check the checkbox next to description
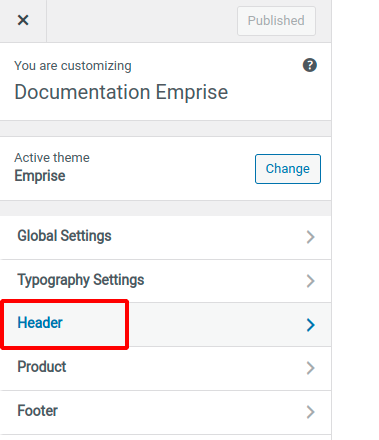
Step 1: Go to Appearance → Customize
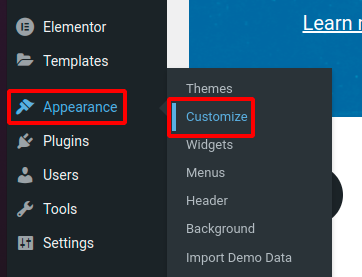
Step 2: Click “Header” Option
Step 3: Click “Add Your Listing” Navigation
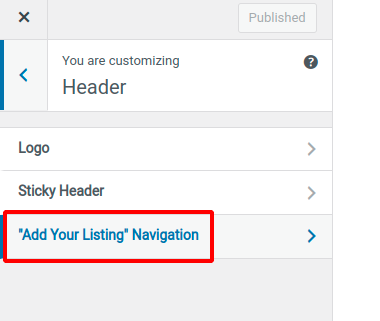
Step 4: Check the Hide option to remove the “Add Your Listing” from menu
Step 5: Click the Publish button to save the changes
Step 1: Go to Emprise Theme Options → Custom Icons
Step 2: Set the .css file path and click “Save”
Step 3: Click the “Scan Font Icons” and refresh the page when prompted.
Step 4: Your custom icons are now added to the default theme icons. You can differentiated between them by the source of it. The default ones are those having source theme, and your custom icons have Admin source.
Pre-Requisite for Demo Import: Woocommerce
The following 4 plugins are required before importing demo content:
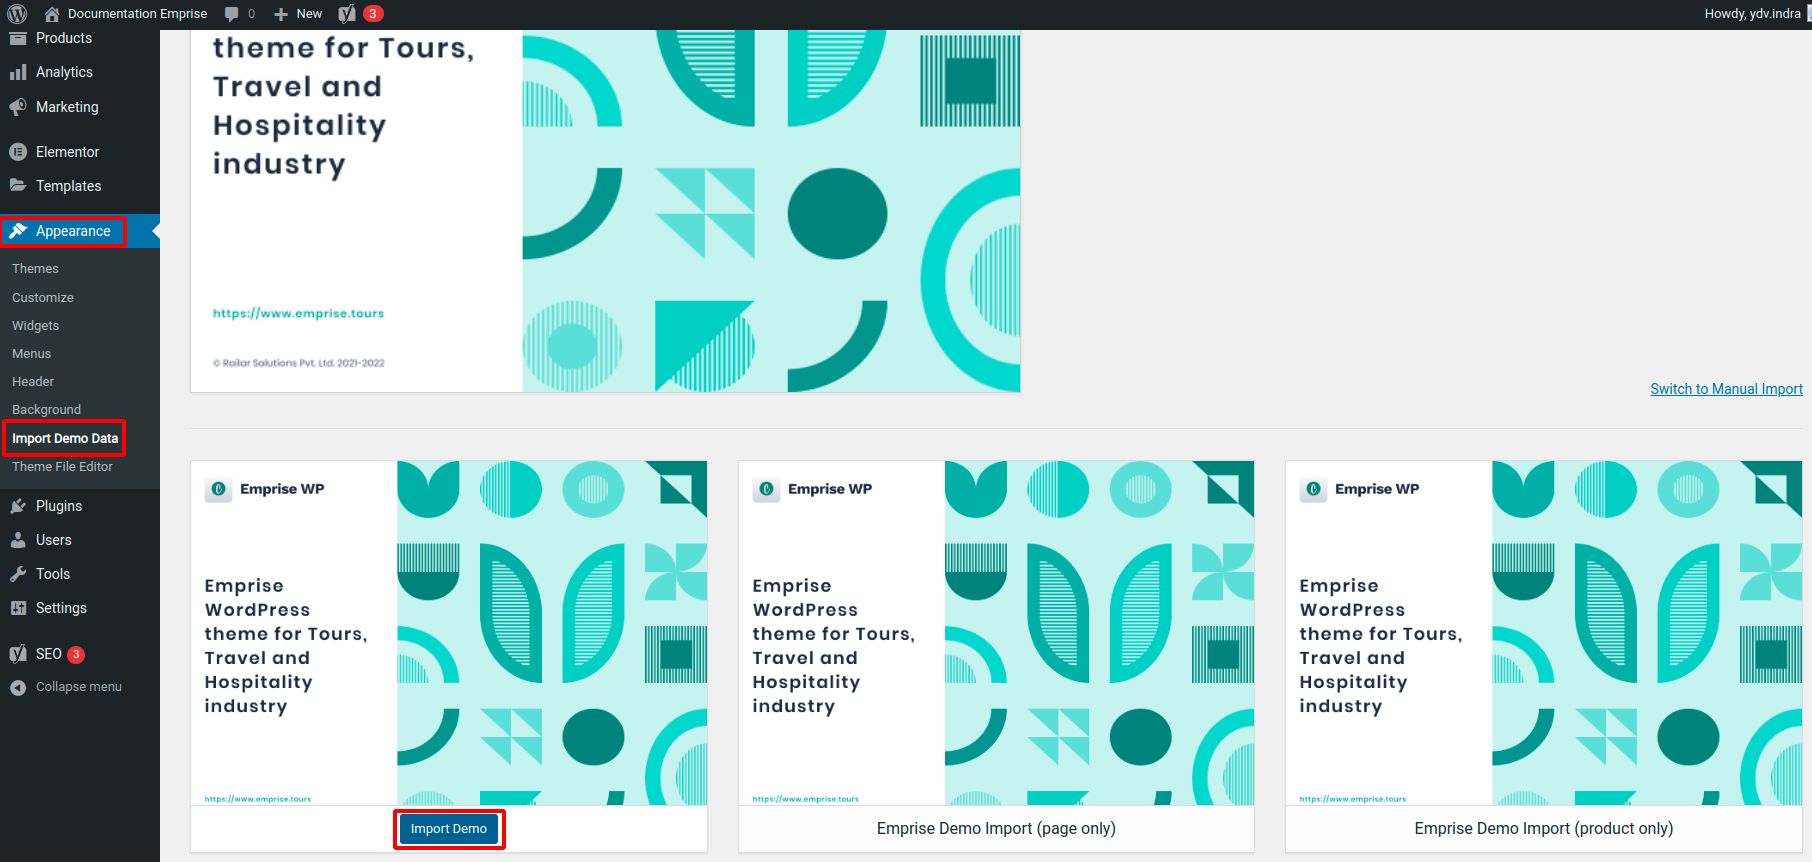
Import Demo Content
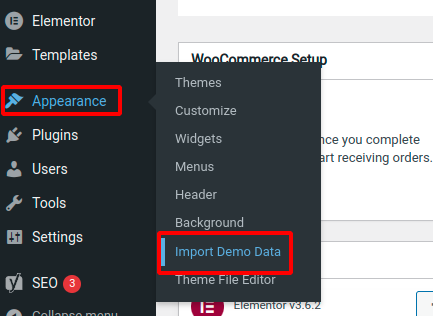
Step 1: Go to Appearance → Import Demo Data
Step 2: Hover over the type of data you want to import and click the “Import Data” button
Step 3: Click the “Continue & Import” button
Step 4: You are shown a successful import page on success of importing data.
Assign Widgets for footer menus
Step 1: Go to Appearance → Widgets
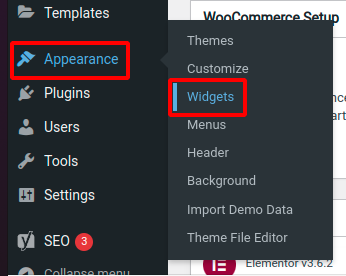
Step 2: Scroll to the bottom to “Footer” Section
Step 3: Click the “+” button and type “Emprise” in the search box. Click the “Emprise Custom Menu”
Step 4: It now allows you to add the menu title and select the menu from the dropdown.
Step 5: Repeat the Steps 3 and 4, to create the required footer menu widgets.
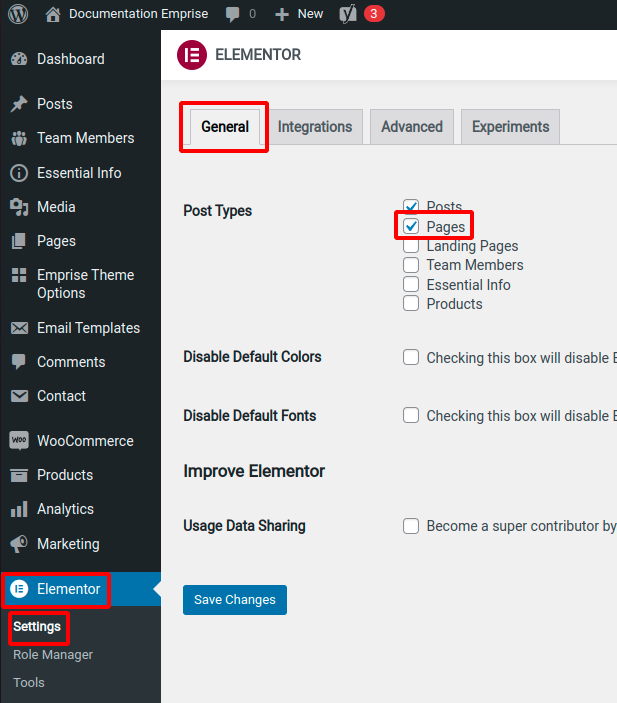
Elementor Page Builder settings
“Pages” post type must be checked under Elementor → Settings under General Tab
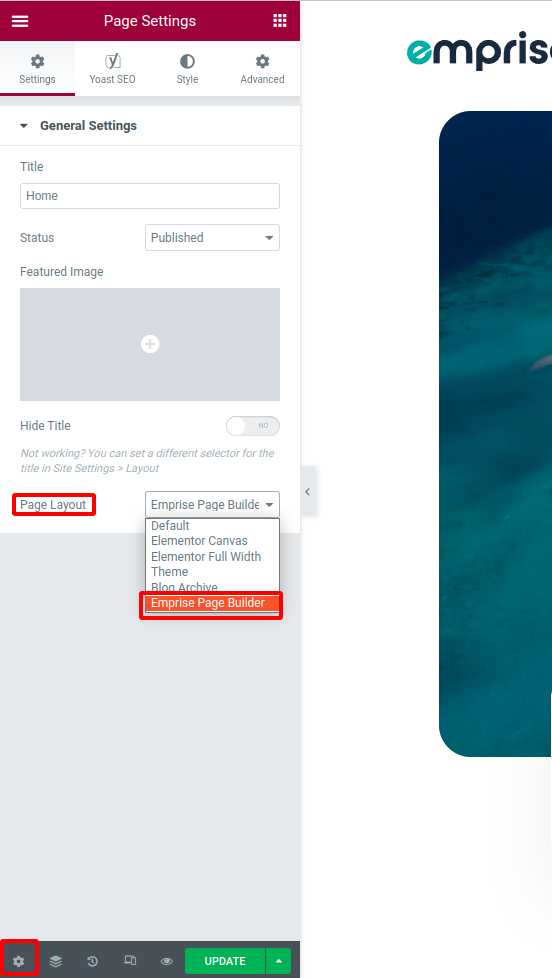
While creating a new page with elementor, “Emprise Page Builder” must be selected as page layout to get the same design layout as in demo. The option can be set by:
Click the settings icon at the bottom left of the page builder, under general settings tab, select the “Emprise Page Builder” from the dropdown as the value of Page Layout.